The de-spindling in pictures.
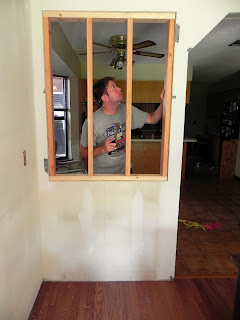
Here is how we began this process, with spindles that dated the house even more so than the wallpaper.
The spindles, along with their brethren trim, rest on a couch from their era. Ah the '80s. The garage may also need an update in the future, you think?
The next steps were to fill in the holes with drywall, tape the edges, and then putty like crazy! I puttied, sanded, reputtied, and resanded for what felt like days. I wanted it perfect. And we got close.
This was our end result ... after we hired someone to come help us perfect our putty job. The wall itself was a bit too 'wavy' for lack of a better word. We love DIY, but sometimes a professional is necessary.
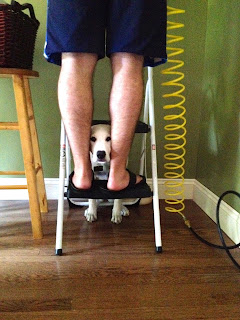
After we painted, it was time for trim. Look at that helpful puppy! The base board was relatively easy. First we painted it and then we started shaving off piece by piece until they each fit perfectly. I was lucky Ben was patient because I would have just measured to what I thought was the perfect fit and CHOP! He measured to what he thought would fit and then shaved off a little less. It took a few tries per board, but it came out beautifully.
We didn't replace the trim around the recessed part of the ceiling, but I did paint it. Slowly. But not as slowly as it took to put up the crown molding.
Crown molding looks beautiful, but I would have to seriously weigh the benefits with the amount of effort that went into to putting it up. In the dining room, I'd do it again. I love it so much!
Bay feels safe with Ben. Ben had a nail gun. Bay was scared of the nail gun, but still felt safer right next Ben and therefore the nail gun. Silly girl!
So this is what it looked like when we moved in. This is your before picture.
This is the after picture! Still needs a few more things on the walls, but at least there isn't wallpaper on the walls! We also have to paint and redo the trim in the living room, but one project at a time!


5 comments:
Looks beautiful! What an improvement, you guys did great!
Thank you! We're definitely excited to be making it our own!
Wow all your work is amazing!! Your home is looking more beautiful by the day!! :-) i love reading your blog Karina!
Thanks, Michelle. We love working on it. Thanks for reading!
I can see you two worked really hard and it payed off. It is so rewarding to do a job yourself. It is so lovely. The floor looks great to me from the pictures as it is. God Bless you in your sweet home!
Post a Comment