Splintering the spindles and throwing them in the garbage pile was some of the best therapy after stressing that we’d never get this house to look how I imagined it could look. Once they were down I was ready to continue. Unfortunately our weekend had drawn to a close.
Weekends feel like the only time available to get any of our
big projects done. After working all day, most people don’t always jump at the
chance to come home and tear off wallpaper. I’m not most people. Every night
for over a week I came home and spent the better part of the evening tearing
off little pieces of nasty, dirty, 27-year-old wallpaper from the walls of our
formal dining room. How do I know it was 27 years old? Well if the solid layer
of dirt didn’t give any indication it was the fact that there was only drywall
underneath. No paint. No prior wallpaper remnants. What I’d like to know was
how long this was there.
Eww.
And what does 27 years of dirt look like? Remove border to
find out.
Double eww.
As with most things lately, my first step before taking down
the wallpaper was to comb Pinterest for ideas on how best to take down
wallpaper (sometimes I seriously wish Pinterest had existed when I was planning
my wedding. Most of the time I thank God it didn’t). Most of what I found/was
told was to use a concoction of water and fabric softener to prime the
wallpaper. We also borrowed one of those perforators and a scraper from a
friend of ours.
After getting all my supplies together, I went to town on
the first panel of wallpaper. Well if you call tearing tiny, nasty, slippery
pieces off for three hours straight “going to town” then that’s an accurate
description. It was a nightmare.
I went back to the drawing (PInterest) board. A lot of
people mentioned steaming as an effective means of removing wallpaper. I did
not have the luxury of a steamer or the budget to purchase one. So I got
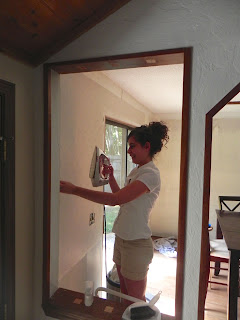
creative. Have iron, will steam. Yep I steamed the whole room of wallpaper with
my clothing iron. I also got an arm workout.
It was really time intensive and lots of patience is required to remove wallpaper, but it was also so rewarding to see the room when it was all off the walls!
What you see me doing in the above picture is priming the walls. Since there was drywall under the wallpaper and no paint, we decided to prime the walls before painting them. We used a primer specifically made for drywall and it worked beautifully. It only took one coat of the final paint color because the primer was so effective. Primer was also about $10 cheaper than the paint used for the top coat, saving us money since we only had to buy one gallon to paint our 144 sq ft room.
 |
| Cover your floor if you don't want to be scraping up paint later. You will spill/splash/sprinkle I guarantee it! |
 |
| Before |
 |
| Paint is up! |
And you should be proud of me for using a color. I was thinking various shades of beige in every room, until I realized I was about to make it as drab as it had been with wallpaper. I love the green!
That's all for now. Next time I'll fill you in on the ordeals of trim and filling in the holes in the wall where the spindles use to be.


